How to Use Custom GitHub Checks Using Jenkins Pipeline?!
Anyone who has used Jenkins before knows How powerful it is and its ability to run complex workflows. In this article, we will show how to build pipelines that get triggered from Github, run on Jenkins, and return build status to GitHub. We will also see how to replace GitHub actions with the Jenkins pipeline. So, stay tuned!

Steps
- Creating a GitHub app
2. Configuring the GitHub app
3. Install plugins on Jenkins.
4. Create new credentials on Jenkins.
5. Create a new pipeline on Jenkins.
6. Enable checks in GitHub
Please, support me by hitting the Clap and Follow buttons to help me write more articles.


I. Creating a GitHub app
We will use a GitHub app to manage the communication with Jenkins.
1. Open your “profile settings”.
2. Go to “Developer Settings”.

3. Fill the following fields:
- Github App name, e.g.: My Jenkins App.
- Homepage URL, e.g. your profile.
- Webhook URL:
i.e. https://<jenkins-host>/github-webhook/
you can get <jenkins-host> from the URL of your Jenkins instance.

4. Repository permissions:
You need to set some permissions to enable the app to communicate with Jenkins and publish its status to GitHub.
- Commit statuses: “Read and Write”
- Contents: “Read-only”, you may need “Read & write” to update the repository such as tagging releases
- Metadata: “Read-only”
- Pull requests: “Read-only”
5. Subscribe to events:
- enable all events.
6. Click ‘Create GitHub app’
II. Configure the GitHub app
- We need to generate a private key authenticating to the GitHub app by clicking the ‘generate a private key option.
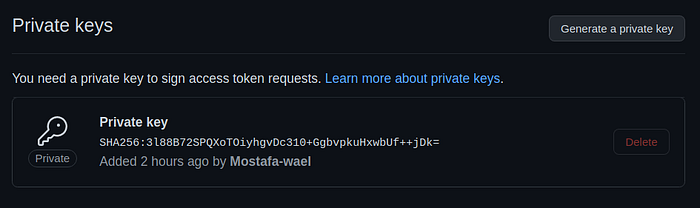
2. After a couple of seconds the key will be downloaded to your downloads folder.
3. Convert the key into a different format that Jenkins can use:
openssl pkcs8 -topk8 -inform PEM -outform PEM -in <the Key>.pem -out converted-github-app.pem -nocrypt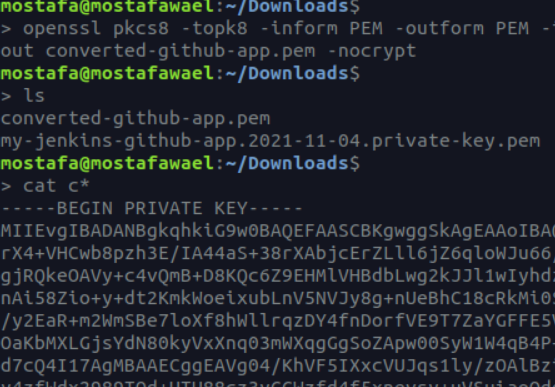
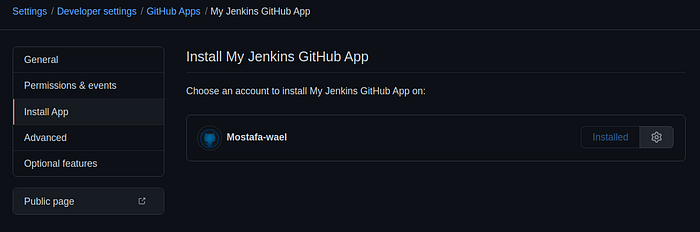
4. Install the GitHub app:
Now, we need to install the app to our repository to be able to use it.
III. Install plugins on Jenkins
We need to install the Github Checks Plugin to be able to manage Github checks using Jenkins.
1. From the Dashboard go to “Manage Jenkins”.
2. Open “Manage Plugins”.
3. Install Github Checks Plugin.
IV. Create new credentials on Jenkins
As we do for any private repo/organization, we need to configure our credentials.
1. From the Dashboard go to “Manage Jenkins”.
2. Open “Manage Credentials”.
3. Pick your credential store e.g: “global”
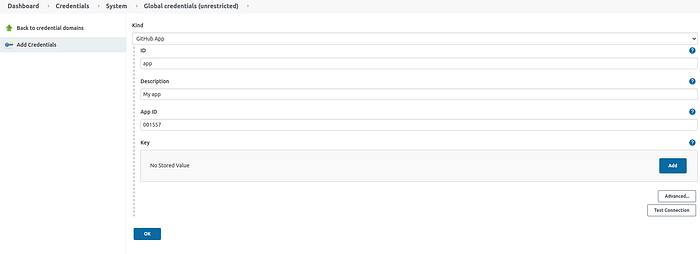
4. Click “Add credentials”
5. Fill out the form:
- Kind: GitHub app
- ID: Its Name e.g.: my_app
- App ID: the GitHub app ID, it can be found in the ‘About’ section of your GitHub app in the general tab.
- Key: click add, paste the contents of the converted private key
- Click OK
V. Create a new pipeline in Jenkins
1. Select the GitHub app credentials in the “Credentials” field dropdown.
2. Validate the “Credentials”.
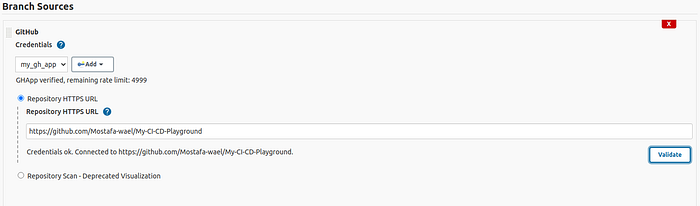
3. Save your pipeline.
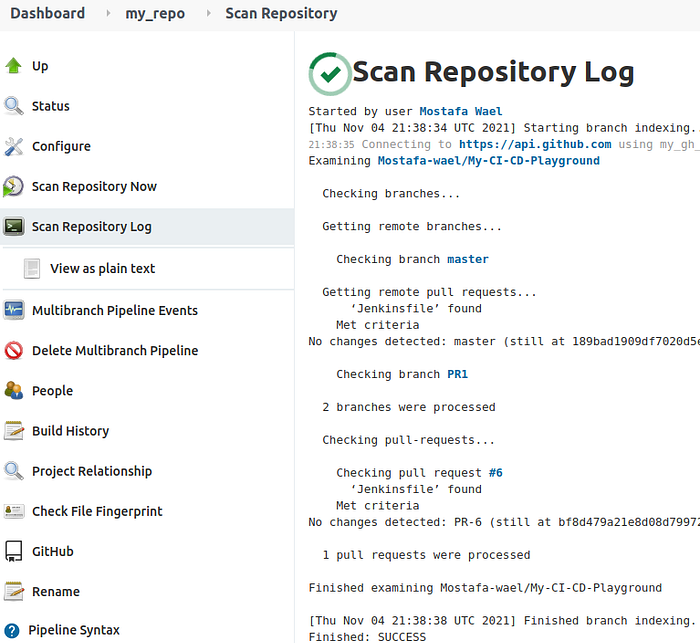
4. Click “Scan Repository Now”.
5. Finished: Success
VI. Enable checks in GitHub
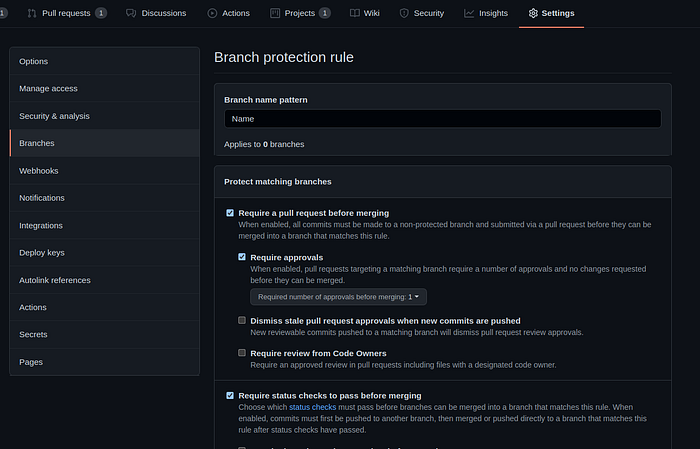
The last step is to enable Github Check in your repo:
- Open the repository settings.
- Choose Branches.
- Check “Require status check to pass before merging”.
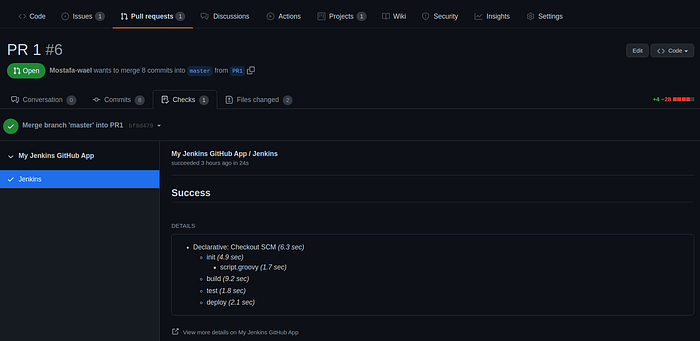
Now, you will see that Jenkins runs checks on its side and send the status to Github.

You can also view more details, open it in Jenkins or try different build parameters.
Final Thoughts
I have spent a lot of time searching for how to add custom Github chacks using Jenkins to my repository. The article is the summary of more than one week of searching and trying different things. Please, support me by hitting the Clap and Follow buttons to help me write more articles.

I don’t receive Medium stipends as Egypt isn’t supported. If you enjoy my content, please consider buying me a coffee ☕ to encourage more posts. Thank you!